made by Leeloumade by Leeloumade by Leeloumade by Leelou

Sunday, December 4, 2011

Golden Wedding Anniversary Canvas & Card


It was recently my mother and father in laws 50th Wedding Anniversary.  In the past I have created cross-stitched wedding samplers to commemorate their achievements, but as I am heavily into papercraft nowerdays I thought my gift to them should reflect that.  I also wanted to make them a card which matched the canvas I had put together.

I used a variety of different items and manufactuers some of which I orderred and some I bought from a £1 store.  I already had a photo of them on their wedding day and the 2nd photo was taken exactly 50 years later.  I managed to get the photo printed and canvas finished for their anniversary party the next day.
The finished canvas and card were very gratefully received (which pleased my lots) .  I really enjoyed putting them both together.

Lynn

Thursday, December 1, 2011

Create - For my craft room door

I made this for my craft room door.  A while ago I bought a box with different colours felt butterflies.   I knew then I would use the box for something else in true scrapbooking style.


I started off by spraying the box with Cosmic Shimmer mist in Golden Fish and let it dry.
 
I used 4 different papers from the Tim Holtz Lost and Found paper stack in the panels.  I then added trim, buttons, angel hair, mesh and a brad in these panels too.

I sprayed the front of  the word 'Create' with Cosmic Shimmer mist in Candy Pink and then covered it with Distress Crackle Paint in Rock Candy from Ranger. I painted the back, sides and odd little bits on the front with black acrylic paint.

I added all the bits and bobs such as the red feather, buttons, angel hair etc then adhered the word to the front.  

I am really pleased with how it turned out and will now take pride of place on my scraproom door.
 
Lynn xXx


Wednesday, November 30, 2011

J..acob

I love making things for my grandson Jacob because he is such a little sweetie.  So when I saw this letter J to be altered I couldnt resist it.


I decided to paint the whole thing with a thin layer of gesso to give it a base.  I then sprayed it with Cosmic Shimmer in Peacock Green with a little Glimmer Mist in Iridecant Gold.

I wanted it letter to reflect my grandson and what he likes so I kept it simple by adding stickers from Echo Park - Little Boy element stickers & Life is Good alpha sticker sheets.

My grandson is like a little angel to me so I attached little angel wings to the back to respresent that.

I hope he likes it!!!


Saturday, November 26, 2011

Nana


I have playing around with the idea of putting some layouts on stretched canvas for a while and this is my second attempt.  The first being Jacob's vRoom.

I painted the canvas with Plaid Decopage Finish in 2052 Sepia and let it dry and framed the photograph with a sticker I got in a kit from QVC ages ago.  I found some matching paper from the MME Laundry Line stack and adhered this to the left hand side of the canvas and layered the framed photo over the top.

I also used alphas and quote card from MME (unintentionally)  I finished the layout off by adding 2 flowers and a gem which I got from my local craft shop (Papercuts-Whitley Bay).

I am looking forward to finding a place to hang this on the wall.

Lynn xXx

Friday, November 25, 2011

Jacob's vRoom Canvas/Scrap 365

I got the very eagerly awaited awatied 1st issue of Scrap 365 yesterday (I would have had it earlier but I've been poorly, sob sob.)   Within the first few pages I was inspired.

On page 6 there is an article called 'Splish Splosh' by designer Mahlin Wiggur.  As soon as I saw it I thought oooh-I like it, I like it.  I have been meaning to put some layouts on stretched canvases for a while and decided to do it for this crafty effort.


My grandson loves anything with wheels on, especially cars and bikes so I decided to use this photo for his door plaque.  I got out my shimmer sprays and paints and had a good time.  I also used Snowtex for a bit of texture under the title.

I really enjoyed making this for my grandson, I sure hope he likes it.

Lynn x


Sunday, November 13, 2011

Name Cards for Work


I have been lucky enough to start a new job which I am enjoying and team I work on are brilliant fun and keep me laughing.

I asked if they would like me to make some name tags but to use 'nicknames' and they said yes.  These are the 1st batch and I have 5 more to make.  They have been received well (especially by the girls).  See below for individual photos.


I also made the following name tag, but as Joakim was leaving for another job I decided to make one with his proper name. 


I will add the 5 other tags (which included one for me) as soon as they are done!  Thanks for looking!

Supersmileysheep (aka Lynn)


Blooming Lovely


I havnt been scrapping much of late, mainly down to the fact that I started a new job a few months back and I have been working totally different hours and just seem to have gotten out of my normal rhythmn.

I bought some new acrylic stamps from my local craft store (Papercuts Ltd) which were Stampendous stamps which have individual petals so you can build different flowers and the Paisley stamps by Smoochie Manoochie(Tracey Grundy) I have 3 sets so far and I love them.

I didnt use a sketch for this layout but just quickly put it together and went with what felt right.

Friday, July 22, 2011

Monolithos Castle

I put the layout together for the following challenges:

Punky Scraps - Sketch Challenge 22
Paper Secrets - July Manufacturer Challenge

This layout is of myself looking through a whole in the wall of Monolithos Castle in Rhodes, Greece.

It's probably not obvious from the photograph but I added small droplets of Cosmic Shimmer to take the 'blankness' off the cardstock.

The manufacturer challenge involved using as much American Products as possible and used the following:
Elements Jewel Brads – Gold, Elements Metal Photo Corners – Pink & Orange, Sweet Shop Collection Papers, Clubhouse Foam Shapes – Fish, Palm Trees and Sun Shapes, Clubhouse Felt Shapes – Circle, AC Flower Stamp (from Sentiments) and

AC Thickers Alphas - Mirror Mirror Robins Egg

I also usedthe following non AC products : Bazzill Basics Cardstock, Bo Bunny Chipboard shapes, Yellow ribbon,

Blue Rik Rak & Sakura Glaze – Blue.

Loved taking part in both of these challenges.

Lynn xXx

Thursday, July 14, 2011

Paper Secrets - Scrap Your Ass Off - Challenge 5

Sketch for Challenge 5 from Paper Secrets


These are the 10 products to choose from, I had to choose 5 and they are highlighted in red.

Hand or Machine Stitiching
Glitter/Stickles/Microbeads
3+Flowers
Rub-ons
3+ Photo Corners
Punch
3+ Tags
Altered or Raw chipboard
Paint
Vellum

and this is the scrapbook page I made using the sketch and products. After embossing and cutting out the flowers and I sanded them, but a petal kept falling of them, so I decided to double them up as photo corners.

I don't normally scrapbook pages about myself but I really loved creating this one.

Hope you like it.

Lynn

Lynn

Tuesday, July 12, 2011

Paper Secrets - Scrap Your Ass Off - Challenge 4

This is the sketch for Paper Secrets - Scrap Your Ass Off - Challenge 4.

This is the layout I put together:

I had to use 5 of the following 10 items - I used the items highlighted red.

Ribbon
Glitter/Stickles/Microbeads
3+Flowers
Rub-ons

3+ Photo Corners
Border Punch
Stamping
Altered or Raw chipboard
Mist
Bling or Pearls

3 photos, which were taken during son's years at school.

I have been meaning to scrap these all seperately anyway so it was nice to use them altogether instead.


I am pleased with how the layout turned out and it has encouraged me to use products I might forget about or not usually use.

Lynn

Monday, July 11, 2011

365 Project - Five Spot Burnet Moths

Five Spot Burnet Moths on 365 Project

Photo was taken in front of Knotts Flats in North Shields/Tynemouth on the last day of the Mouth of the Tyne Frestival 2011. We were walking along looking for a geocache when I 'spotted' these (pardon the pun) and I couldn't resist taking a photograph.

Lynn

Glass by Lynn Dunton · 365 Project

Glass on 365 Project

Monday's photograph, taken though my kitchen door window which leads to the back garden. I liked the colours showing through.

Lynn

Monday, July 4, 2011

Paper Secrets - Scrap Your Ass Off - Challenge 3

I am still taking part in the Scrap Your Ass Off challenges over at Paper Secrets and this is my layout for challenge 3.


This is the sketch for Challenge 3 .
I had to use 5 of the following products: The ones I chose are highlighted red.

Ribbon Glitter/Stickles/Microbeads
3+Flowers Rub-ons
3+ Photo corners Border Punch
Stamping Altered or Raw chipboard
Mist Bling or Pearls

I have been wanting to scrap these scans of my grandson for ages (he is now two years old) but wasn't sure which way I wanted to scrap them. The sketch prompted me to and I am happy with the result.

I used two lengths fo ribbon and intertwined them to represent the double helix of DNA.

Hope you like it...and remember....

A day without scrapping in like a day without sunshine!!

Lynn

Friday, June 24, 2011

Play

I have taken part in sketch challenge #161 taking place over at Creative Scrappers.

Here is the layout below


And this is sketch #161 which I used as inspiration.
I have had the paper, cardstock and photograph for this layout set aside for at least 6 months but somehow I never managed to get around to scrapping it.

When I saw this sketch, I discovered the stash & photo set to one side and decided this was the time to scrap it.

I love the colours in this layout and thought it reflected how 'aglow' my grandson looks in the photograph.

Thanks for looking.

Remember a day without scrapping is like a day without sunshine!!

Lynn

Wednesday, June 22, 2011

My Mother

I have been meaning to scrap a photograph of my mother for absolutley ages, but (and my mother will readily admit this) she isn't very photogenic and I rarely manage to get a good photograph of her.

I was looking through my hard-drive and discovered the photo I haved used. I had only a day before bought 2 new paper stacks from First Edition Papers (Up, Up and Away & Spring Feast) and decided to use the Spring Feast.

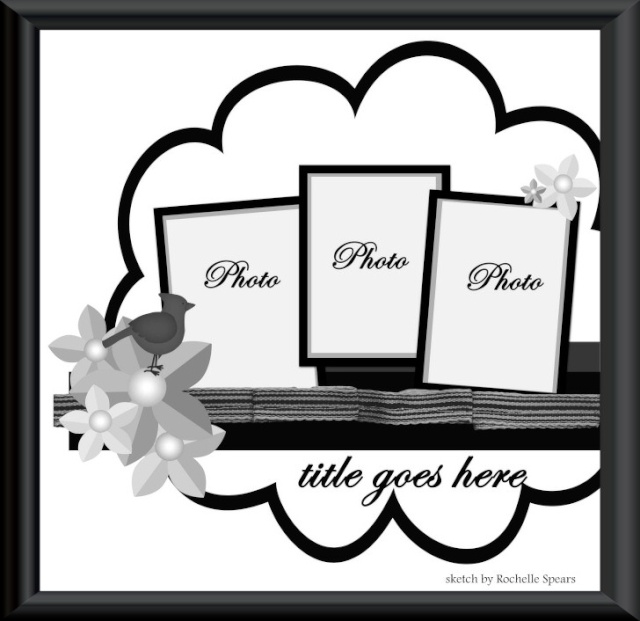
This is the layout I decided to put together.

I used: Core'dinations cardstock, First Editions Papers - Spring Feast, Royal Langnickel rub-ons, Rose flower trim, pink ribbon, blue/white spotted ribbon, Prima gem flower embellie, buttons and Studio G butterly stamp.

I normally go for brighter papers and was surprised at my choice of these to be honest, but I am really pleased with the way this has turned out and what's more my mother loves it.

Remember.....a day without scrapping is like a day without sunshine!

Lynn

Paper Secrets - Scrap Your Ass Off - Challenge 2

This is the Scrap Your Ass Off - Challenge 2 sketch


The challenge was to use the above sketch and use 5 out of 10 of the following:

Tape 3+buttons
3+flowers Rub-ons
3+ photo corners 3+brads
Stamping Altered or Raw chipboard
Mist Dry or Heat embossing

The words highlighted red are the products I used.

I am really enjoying taking part in the challenge so I am looking forward to adding more to my blog soon.

Remember a day without scrapping is like a day without sunshine!

Lynn


Wednesday, June 15, 2011

Painting the Town Layout

Another day, another blog post. I found these photographs while rooting through my hard-drive. They are from years ago (trying to work when) and I must have scanned them in as they are pre-digital photos.

They photos were taken while I was visiting friends in Kilmarnock, Scotland. We were all out for a night out in Glasgow and a fine time was had by all. (As you can see!!!)

I used a kit from Gauche Alchemy which feature a wide variety of found objects and vintage ephemera, as well as newly manufactured supplies. I have several of their kits and I love them.

I also used some cherry paper from Imaginisce, Flower Soft (for the photographs), black brads and a few other bits I cannot remember the name of.

Thanks for looking....and remember....

A day without scrapping is like a day without sunshine!

Lynn

Monday, June 13, 2011

Snow Much Fun


Jacob in the Snow I took these pictures for this layout when we had lots of snow before Christmas. He fell over face first into the snow and was not amused at all.

I used Bazzill bling cardstock, free papers from Scrapbook Magazine, gesso & a Martha Stewart punch.


Sunday, June 12, 2011

Paper Secrets - Scrap Your Ass Off - Challenge 1


I am taking part in an onging challenge over at Paper Secrets - called 'Scrap Your Ass Off!'

This is the sketch for the 1st challenge - see above.

Part of the challenge is to use 5 of the 10 following products/tools/techniques.

Ribbon
3+ buttons
3+ flowers
rub-ons 3+ photo corners
3+ brads
Stamping
Altered or raw chipboard
Mist (Cosmic Shimmer/Glimmer Mist)
Dry or Heat embossing

I used the 5 items highlighted red.

The rings on the left of the layout are meant to represent the rings you get on a beer mat from your glass.

Hope you enjoy! .....and remember.........

A day without scrapbooking is like a day without sunshine!

Wednesday, May 18, 2011

Two Stone Layout


I loved these pictures of my grandson when I took them and couldn't wait to scrap them. I wanted to keep all of photographs as I had printed them so I did a double layout.

I used lots of stars as my grandson is 'my little star' and the light of my life, he makes me smile so much. I think I have created more sb pages about him then anyone/thing else.

The big yellow star is a charm of an old handbag and the metal stars were just plain and I put them through my embossing machine with the bubbles folder.

A day without scrapbook is like a day without sunshine!

Tuesday, April 19, 2011

In Triplicate


The photo for this layout was taken years ago with a film camera. When I picked it up form the processor I realised the film must not have wound on properly, but it makes for an interesting photograph. I love that he has a slightly different expression on each exposure. I think my son was about 5-6 years old when the photo was taken.

For this layout I cut a piece of cardboard to 12" x 12" and roughly painted the majority of it wiht red acrylic paint. I then sprayed it with gold glimmer mist and let it all dry. After this I used a Creative Expressions - Metal Effect Mask and sprayed through it with Slate Glimmer Mist.

I inked up a Bo Bunny Cogsmo journalling card with Ranger Distress Inks - Tea Dye and Fired Brick and let this dry too. I distressed the edge of my photograph and adhered it to the layout along with the cogsmo journalling tag and some old tickets. I added a MME journalling tag which I had distressed with white gesso.

I finally added the title using Sassafras Lass monstrosity alpha, stamped the robot stamp three times so each was lighter than the next (as a reference to the photograph) and added the Cogsmo black chipboard.


Wednesday, March 16, 2011

Jacob's 2nd Birthday Card


This is the card I made for my grandsons 2nd birthday.

Jacob - You are so cute


I am so so used to relying on the multitude of patterned papers I own and not using the big drawer full of stamps I own.

So for this layout I decided to create pattern using other methods.

I used white acrylic paint to create a block to stamp onto using blue acrylic paint and a Prima stamp.

I used a piece of shaped mulberry paper and used a peice of net (which protects oranges) to spray over with cosmic shimmers.

I also used another stamp to stamp the pattern onto the foam letters.

I bought the foam letters from a £1 store and they are the kind you buy your kids to stick on the side of the bath. They are all in primary colours and quite big, so were fun to use.

I am pleased with this layout and glad I challenged myself a little.

Bye for now.

Lynn